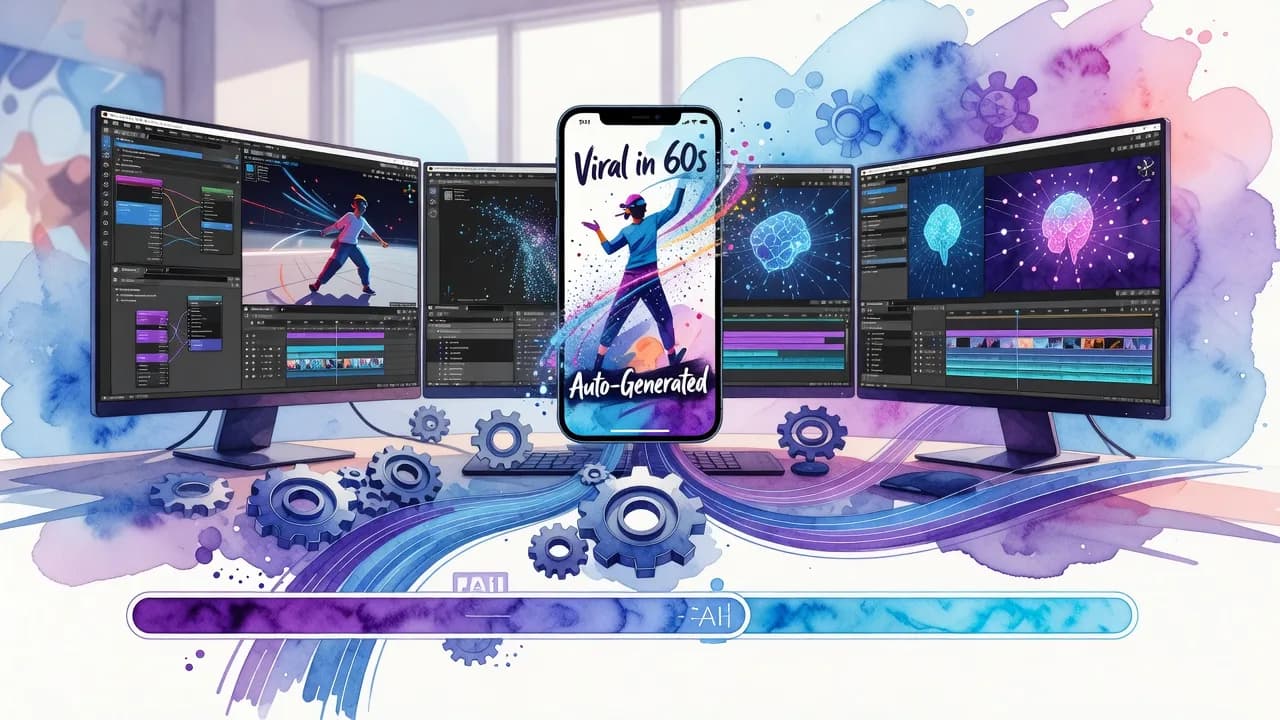
Turn 3D Renders into Social Shorts with AI at Scale
Introduction
Short-form video is now the default language of social feeds. For teams producing 3D content in Blender, Unreal Engine, or Unity, the question isn’t whether to post Shorts, Reels, and TikToks—it’s how to do it every day without grinding the team to dust. The answer is a pipeline. When you treat 3D-to-shorts like an assembly line—reframe, caption, compress, publish—you unlock repeatability, speed, and scale.
In 2026, the marketing case is clear. Meta has reported that video ads outperform static images by a wide margin, and platforms have trained audiences to expect vertical, tightly edited, captioned clips. The good news: much of this is automatable with mature, open tools. The better news: AI makes the labor-heavy parts—reframing, tracking, captioning, and selection—fast and consistent.
This guide lays out a research-grounded, tool-specific workflow for turning renders into social-ready clips, with tradeoffs and implementation tips that help marketers and brand managers move from proof-of-concept to production throughput.
Why 3D-to-Shorts Is a Pipeline, Not a One-Off
Shorts behave more like product packaging than cinema. The structure repeats: a source clip, a vertical crop, captions or overlays, and compression dialed for fast upload. That predictability is a gift because pipelines love repeatable steps. A free FFmpeg-based approach shows how far you can go with scripting: cut source segments, auto-crop to 9:16, burn-in captions, and encode with presets—all in batches.
For marketers, the real advantage is controllable variance. You can ship 10–50 versions that differ in hook, angle, captioning style, or speed, then read performance and iterate. Consistency in look and cadence builds brand memory; variety in hook and framing keeps fatigue at bay. The pipeline mentality lets you hold both.
From Render to Reel: The Working Pipeline
Think in six stages that map to real tools and APIs.
- Plan and render
- In Unreal Engine, use Sequencer to export consistent shots and camera moves. In Unity, Timeline fills the same role. In Blender, keep naming and camera conventions predictable for batch export.
- Offload heavy frames to cloud render farms when deadlines spike; elastic compute removes local hardware limits and shortens turnarounds on complex scenes.
- Detect scenes and pick segments
- Use an AI video editor pipeline that supports scene classification with a vision model (e.g., Qwen2.5-VL) to propose highlight segments. This turns a five-minute cinematic into 5–15 candidates for social edit.
- Reframe to vertical
- Start with Fit vs Fill logic from FFmpeg: letterbox (fit) when you need the entire frame; smart crop (fill) when action is centered.
- Upgrade to subject-aware reframing. AutoCrop-Vertical uses YOLOv8 to detect people and choose dynamic crops per scene, avoiding static center crops that miss the point.
- Track, follow, stabilize
- For subjects that move, combine a detector (YOLOv8) with a tracker such as DeepSORT or ByteTrack to maintain persistent IDs. In face-led content, BoT-FaceSORT improves identity consistency while remaining fast—useful for keeping attention on a stylized character or helmeted pilot.
- Caption and beat-match
- Generate subtitles with Whisper to reach sound-off scrollers. Use beat detection to align cuts or speed ramps to music cues. For stylized animation that needs extra smoothness, RIFE frame interpolation can raise the apparent frame rate without re-rendering.
- Compose and encode
- Assemble crops, overlays, B-roll, and transitions in the Compose stage with Remotion, Creatomate, or custom FFmpeg filter graphs. Encode H.264 for universal delivery; consider H.265 or AV1 for storage or platforms that accept them.
Finally, govern and publish. Add C2PA signing if you run an authenticity program, then push to YouTube, TikTok, and Meta via their APIs with scheduled metadata. The point is not a single magic tool but a chain you can observe, measure, and improve.
Smart Reframing That Respects the Shot
Static center-crop is the fastest path to broken compositions. Smart reframing mixes two ideas: rules of thumb (keep eyes near the upper third) and machine vision (track what matters).
- Fit vs Fill: In FFmpeg, “fit” scales the full landscape frame into a vertical container and pads the rest; “fill” scales up and crops to cover the vertical frame. Fit preserves context, fill maximizes subject size.
- OpenCV smart crop: A simple approach analyzes saliency across the frame to center important regions, but detectors are more reliable.
- YOLOv8 + trackers: With YOLOv8 detecting people or vehicles and DeepSORT or ByteTrack maintaining IDs, you can slide the 9:16 window to follow the subject smoothly. For face-centric shorts, BoT-FaceSORT improves who-is-who across frames—useful in multi-character 3D sequences.
Here is a practical FFmpeg starter for fill-style 9:16 with caption overlay and upload-ready compression:
ffmpeg -i input.mp4 \
  -vf "scale=-2:1920:force_original_aspect_ratio=increase, \
       crop=1080:1920:(in_w-1080)/2:(in_h-1920)/2, \
       drawtext=text='%{pts\:localtime\:%T}':x=40:y=h-120:fontsize=36:fontcolor=white:shadowcolor=black:shadowx=2:shadowy=2" \
  -c:v libx264 -preset veryfast -crf 18 -c:a aac -b:a 192k output_9x16.mp4
Swap drawtext for subtitles if you have an .srt from Whisper; keep presets consistent across batches to stabilize quality.
Captions, Rhythm, and Speed: The Watchability Layer
Captions are not decoration; they’re comprehension. Whisper can batch-generate transcripts and timestamps, which you can style as burned-in text or soft subtitles. Keep font sizes legible at phone distance and use contrast-safe outlines or shadows.
Beat detection helps your 3D motion land like choreography. Even one or two on-beat cuts lift perceived polish. Speed ramping (1x–6x) can compress slow camera glides into snappy beats, while freeze detection and silence detection prevent dead air slips.
When stylized motion feels choppy at 24 fps in the vertical crop, RIFE interpolation can smooth motion without re-rendering your 3D scene. Use it sparingly; over-smoothing can reduce the sense of weight in action shots.
Generative Variants: When to Use Runway or Pika
Generative video tools such as Runway Gen-3 and Pika are not drop-in replacements for your renderer, but they are fast variant machines. If your 3D clip is the “master,” gen-video can synthesize alternate looks, transitions, or stylized B-roll that extends the main idea.
For social output, defaults matter. Pika emphasizes social-native aspect ratios, making 9:16 and 1:1 a one-click move. Runway supports the same formats and can shine on wider content. In a production pipeline, treat them as creative branches that feed the Compose stage—never as a single point of failure.
Good use cases:
- Hook variations that restyle the same action beat.
- Alternate backgrounds or lighting vibes for A/B tests.
- Transitions between 3D shots when you lack coverage.
Orchestrating at Scale: Batches, GPUs, and Airflow
At scale, the challenge is orchestration, not knobs. A sensible pattern is:
- Ingest renders from cloud storage and register shots with metadata (project, camera, duration, safe crop zones).
- Run a GPU batch step for detection/tracking with YOLOv8, followed by DeepSORT/ByteTrack or a face-centric tracker like BoT-FaceSORT if characters sell the story.
- Auto-generate caption files via Whisper; cache language variants.
- Compose timelines with Remotion, Creatomate, or FFmpeg filter graphs.
- Encode to platform specs; name files deterministically.
- Optionally sign with C2PA metadata and push to queues connected to YouTube, TikTok, and Meta APIs.
Teams often wire this with an orchestrator such as Airflow: DAGs map each stage, retries are automatic, and throughput scales horizontally. Cloud render farms handle the heavy path (frames), GPUs handle the inference path (detections), and CPUs finish the encoding path.
Open-source baselines are improving. One AI video editor pipeline demonstrates scene classification with Qwen2.5-VL, mode-specific logic for Reels, speed ramps, silence checks, teaser generation, background music, and watermarking. Use it as a reference for your own modes: “product demo,” “launch sizzle,” “behind-the-scenes.”
Quality, Compression, and Platform Nuance
Compression is where good work dies or flies. H.264 remains the universal safety net for uploads; H.265 and AV1 can save storage or improve quality per bit where accepted. Keep presets consistent to avoid quality swings across a carousel.
For landscape masters, a letterbox pass can be right when UI or spatial context matters, such as HUDs in a cockpit render. But most short-form feeds reward fill-style crops that maximize subject size. If a shot cannot survive cropping, export a separate 9:16 camera from Sequencer or Timeline to preserve intent.
Subtitles should survive platform re-encoding. Favor high-contrast text with a drop shadow; test on low-brightness screens. Use brand-consistent lower-thirds sparingly; over-stylizing hurts legibility.
Measuring What Matters
Treat each short as an experiment. Suggestions:
- Instrument hooks: Try alternate first two seconds—camera push-in versus action freeze.
- Vary caption density: Full transcript versus distilled keywords.
- Test background treatments: Letterbox bars with brand color versus pure fill.
- Track retention curves and completion rates; roll insights into the next batch.
The goal is to increase the yield of “keepers” per render. With a reliable pipeline, you can afford to explore the long tail of variants and still ship predictable winners.
Example: From Unreal Sequencer to TikTok in Hours
- Morning: Export five camera takes from Sequencer with consistent naming. Kick a cloud render batch for 4K masters.
- Midday: Run YOLOv8 detection and DeepSORT tracking across the five takes; auto-propose three subject-following crops per take.
- Afternoon: Whisper generates captions; a Compose pass assembles three hooks per take with on-beat cuts and speed ramps. Encode H.264 9:16 masters.
- Evening: Approve overlays, add C2PA if applicable, and publish via API with A/B thumbnails.
This is not futuristic; it is today’s stack.
Implementation Notes and Gotchas
- Detection choices are content-specific. For stylized characters with helmets or masks, lean on trackers robust to occlusions. Face-centric trackers like BoT-FaceSORT can hold identity better in unconstrained motion.
- Avoid over-cropping UI. Some 3D scenes communicate through on-screen widgets; use fit-style letterboxing or pre-authored vertical cameras.
- Beware double compression. Export clean masters; let the pipeline encode once; upload; let the platform re-encode. Extra steps degrade detail.
- Keep GPU inference and CPU encoding separate if you can; they compete for thermal headroom on single-machine builds.
Quick Checklist
- Export predictable shots from Sequencer or Timeline with clear names
- Choose fit vs fill per scene; use AutoCrop-Vertical for subject-aware crops
- Run YOLOv8 + DeepSORT/ByteTrack (or BoT-FaceSORT for faces) for tracking
- Generate subtitles with Whisper; style for legibility at phone distance
- Compose with FFmpeg filter graphs, Remotion, or Creatomate
- Encode H.264 for upload; keep presets consistent across batches
- A/B test hooks, caption density, and background treatments
FAQ
Do I need to re-render vertical, or can I crop everything?
You can crop much of it, but not all. When key information sits near the edges—UI, multiple characters, environmental cues—export a dedicated 9:16 camera from Sequencer or Timeline to preserve intent.
Which smart crop approach is best for character-heavy scenes?
Use a detector plus a tracker. YOLOv8 finds subjects; DeepSORT or ByteTrack maintains IDs. For face-led shorts or helmeted characters, BoT-FaceSORT improves identity consistency and keeps the crop locked on the right person.
How should I handle captions for sound-off viewers?
Batch-generate with Whisper, then style burned-in text with high contrast and short, readable chunks. Keep lines tight and avoid covering the subject. Soft subtitles are fine, but burned-in captions ensure consistency across platforms.
When do generative tools like Runway Gen-3 or Pika make sense?
Use them for creative variants—alternate hooks, stylized transitions, or B-roll. Pika’s social-native aspect ratios speed 9:16 work; Runway handles widescreen well. Treat them as branches that feed the Compose stage, not replacements for your renderer.
What formats and codecs should I prioritize?
Default to H.264 for uploads to maximize compatibility. Keep an eye on H.265 and AV1 for storage or supported targets. Maintain consistent presets to stabilize quality and file size across large batches.
Final Thoughts
In practice, the winning strategy is unglamorous: build a boring, observable pipeline and iterate on creative at the edges. The evidence is clear that shorts are formulaic—source, crop, captions, compression—which is exactly why they scale so well with automation.
The bigger picture is that AI is a force multiplier, not a silver bullet. Detectors and trackers make crops respectful of composition; Whisper opens content to sound-off audiences; gen-video adds rapid variant creation. But orchestration—naming, batching, retries, and QA—decides whether you ship daily or drown in exceptions.
What this suggests for 2026 is simple: treat 3D-to-shorts like marketing ops. Push rendering to elastic compute, inference to GPUs, composition to scripts, and publishing to APIs with governance. Then spend your human time where it pays back—hooks, beats, and ideas. The technology stack is ready; the constraint is process discipline and taste.
Sources
- I Built a Free AI Pipeline for YouTube Shorts Using FFmpeg - DEV Community
- GitHub - kamilstanuch/Autocrop-vertical: Smart video converter using YOLOv8 and FFmpeg to convert horizontal video to vertical 9:16 format for social media. · GitHub
- I Replaced My Render Engine With AI (Here's the Exact Workflow)
- AI-Powered Video Editing Solutions: The 2026 Platform Playbook
- Vibemyad | Runway Gen-3 vs Pika 1.0: Best AI Video Generator for Performance Marketing | VibeMyAd Blog
- Pika vs. Runway: Which AI Video Generator Is Better for Viral Social ...
- The Revolution of Cloud-Based Render Farms in Professional VFX Workflows | Larry Jordan
- Unreal Engine’s Systems and Workflows Overview for Unity Developers | Unreal Engine 5.7 Documentation | Epic Developer Community
- Fast Cloud Render Farm - Fully Automated 3D Rendering
- GitHub - mazsola2k/ai-video-editor: AI Video Editor Pipeline with Vision LLM Models · GitHub
- ffmpeg-engineering-handbook/docs/operations/scaling.md at main · endcycles/ffmpeg-engineering-handbook · GitHub
- GitHub - argorar/WebMConverter: GUI for ffmpeg to convert videos to WebM and mp4. · GitHub
Ready to Get Started?
Explore production-ready 3D models for your next project. Browse the 3D model catalog to download assets you can use right away.
Turn this workflow into real deliverables
Browse production-ready 3D models for your next project, then step into 3d modeling if you need a custom build.